 온주 카이신 카이신 금속 유한공사

SCH 40 배관 시스템 설치 요령
A well-installed SCH 40 pipe system starts long before the first cut. Whether you are working with schedule 40 PVC for water movement, drainage, irrigation, or a suitable metal system such as sch 40 stainless steel pipe, the best results come from matching the material, size, layout, and joining method to the job. This guide walks through practical installation habits that help reduce leaks, misalignment, wasted material, and avoidable maintenance.
What should you check before installing SCH 40 pipe?
Before installation, confirm the application, material, pipe size, fittings, pressure or temperature needs, and local code requirements. Schedule 40 pipe is a wall-thickness classification, not a complete specification by itself, so the right choice depends on both the schedule and the material. A pvc schedule 40 system, for example, is handled differently than a sch 40 스테인리스 스틸 파이프 system, even if both are described as SCH 40.
Start with the design conditions. Will the pipe carry potable water, process fluid, compressed air, wastewater, irrigation flow, or another service? Will it be buried, exposed to sunlight, routed through a building, or connected to equipment that vibrates? These details influence the correct pvc pipe types, joining method, supports, and allowances for expansion.
It is also important to review schedule 40 sizes early. Nominal pipe size can be confusing because the name of the pipe is not always the same as its measured outside diameter. That is why installers should verify sch 40 dimensions using manufacturer data, approved submittals, or project specifications before cutting, ordering fittings, or drilling penetrations.
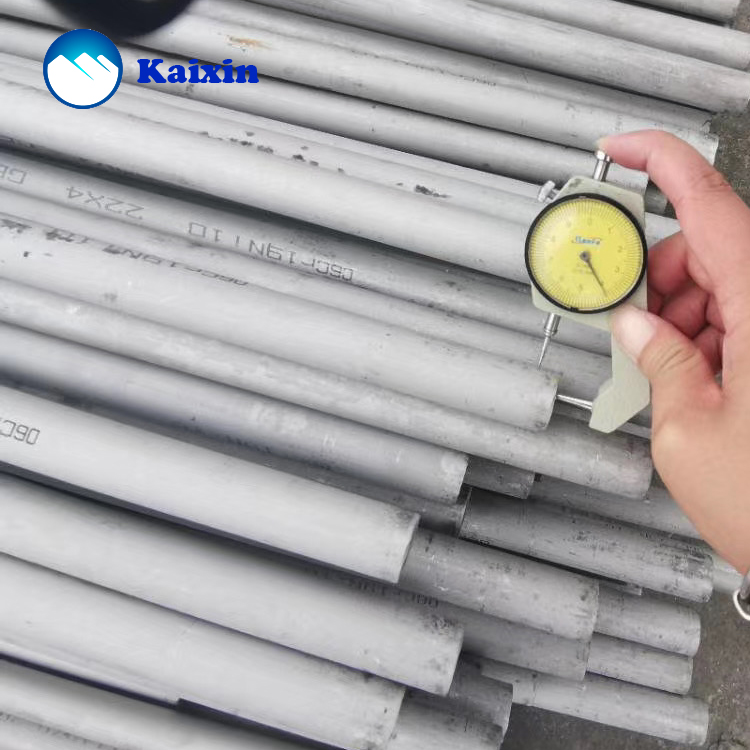
installer measuring white schedule 40 pipe before cutting
Size selection affects flow, fit, and service life
Choosing between common options such as 1 1 2 sch 40 pipe, 2 1 2 sch 40 pipe, and 3 sch 40 pipe is not just a matter of what physically fits. Pipe size affects flow capacity, friction loss, pump performance, drainage behavior, and how easy the system is to support. Oversizing can increase cost and create sluggish movement in some systems, while undersizing may cause pressure loss, noise, or poor performance.
Use the project plan or engineering guidance as the starting point. If you are replacing an existing line, do not assume the old size is correct simply because it was already there. Existing systems may have been modified, extended, or installed under different requirements.
A practical pre-installation checklist should include:
- Confirm the material: schedule 40 pvc, stainless steel, or another approved option.
- Match fittings to the exact pipe material and nominal size.
- Check sch 40 dimensions before cutting or fabricating supports.
- Confirm solvent cement, primer, gaskets, clamps, or welding procedures are suitable for the pipe.
- Plan access for valves, unions, cleanouts, and future maintenance.
- Account for expansion, contraction, vibration, and movement.
- Verify that the installation method meets applicable codes and project requirements.
This step may feel basic, but it prevents many common field problems. A small mismatch between pipe, fittings, and joining products can lead to leaks, weak joints, or rework after the system is already installed.
Cutting and preparation set the tone for the whole system
Clean, square cuts make a noticeable difference in SCH 40 installations. A crooked cut can reduce socket engagement, create uneven stress at the fitting, and make the pipe harder to align. Use a cutter or saw appropriate for the material, and support the pipe so it does not flex or chatter during cutting.
After cutting pvc schedule 40, remove burrs from the inside and outside edges. Burrs can interfere with fit-up, catch debris, or disturb flow. A slight bevel on the pipe end also helps it enter the fitting socket smoothly and reduces the chance of pushing solvent cement out of the joint.
For metal systems, preparation is equally important but different. Sch 40 stainless steel pipe may require cutting, deburring, cleaning, threading, grooving, welding, or mechanical joining depending on the system design. Keep surfaces clean and follow the specified procedure, especially where 내식성, sanitation, or pressure integrity matters.
How do you make stronger PVC Schedule 40 joints?
Strong schedule 40 pvc joints come from proper fit, clean surfaces, correct primer and cement use, full socket insertion, and enough cure time before testing or service. Solvent-welded joints are not simply glued together; the joining process softens and fuses compatible surfaces. Rushing that process is one of the easiest ways to create a weak connection.
Dry-fit the layout first, but remember that dry-fit depth may differ from final solvent-welded insertion. Mark alignment lines on fittings and pipe so elbows, tees, and valves land in the intended position. Once primer and cement are applied, you have limited time to assemble and orient the joint.
A good PVC joint process usually follows this sequence:
- Cut the pipe square and remove burrs.
- Wipe dirt, moisture, and debris from the pipe and fitting socket.
- Confirm the pipe bottoms properly in the fitting socket.
- Apply approved primer where required.
- Apply the correct solvent cement evenly to both mating surfaces.
- Insert the pipe fully with a slight twist, then hold briefly to prevent push-out.
- Wipe excess cement without disturbing the joint.
- Allow the joint to cure according to product instructions and job conditions.
Temperature, humidity, pipe size, and fit can all affect working and cure times. Larger pipe, including 2 1 2 sch 40 pipe or 3 sch 40 pipe, often demands more careful handling because alignment and insertion force become harder to manage.
Support, alignment, and movement control matter
A pipe system should not depend on fittings to carry loads they were never meant to support. Use hangers, clamps, straps, or bedding that suit the pipe material and installation environment. Supports should hold the line securely without crushing, gouging, or restricting natural movement.
For buried schedule 40 pipe, trench preparation matters. Remove sharp debris, provide stable bedding, and avoid point loads that can stress the pipe wall. Backfill should be placed carefully enough to keep the pipe aligned while protecting it from damage.
For exposed PVC runs, consider thermal movement. PVC expands and contracts with temperature changes, so long straight runs may need space, offsets, or expansion provisions. Outdoor schedule 40 pvc may also need protection or product selection suitable for sunlight exposure.
Metal SCH 40 systems have their own movement concerns. Stainless steel can handle different conditions than PVC, but it still needs proper support, isolation from incompatible materials where required, and attention to expansion, vibration, and connection stress.
Common mistakes to avoid during installation
Even experienced installers can run into problems when schedule, material, and field conditions are treated too casually. Many issues come from small shortcuts that seem harmless during installation but show up during testing or long-term use.
Watch for these common mistakes:
- Mixing incompatible pvc pipe types, fittings, primers, or cements.
- Assuming all schedule 40 sizes have the same actual measurements across materials.
- Cutting pipe without allowing for full socket depth.
- Skipping deburring after cutting.
- Installing pipe under tension to “make it fit.”
- Over-tightening threaded plastic connections.
- Failing to support valves, pumps, or heavy fittings independently.
- Pressure testing before joints have cured properly.
- Ignoring access needs for future inspection, cleaning, or replacement.
A clean installation is not just about appearance. Straight runs, properly seated fittings, and well-placed supports make the system easier to test, maintain, and troubleshoot.
Final checks before pressure testing or startup
Before testing, walk the full line from end to end. Confirm that all joints are complete, supports are secure, valves are in the right position, and temporary caps or plugs are accounted for. Check that the installed sch 40 pipe matches the approved layout and that transitions to equipment or other materials are properly made.
Pressure testing should follow the applicable procedure for the material and system type. Use the correct test medium, pressure, duration, and safety precautions. Never stand directly over or in front of pressurized components, and do not exceed the limits of the pipe, fittings, valves, or joining products.
If a leak appears, avoid quick cosmetic fixes. Depressurize the system, identify the cause, and repair it according to the pipe material and connection method. A careful repair is always better than hiding a weakness inside a finished installation.
The takeaway for better SCH 40 installations
SCH 40 pipe systems perform best when sizing, material selection, preparation, joining, support, and testing are handled as connected parts of the same job. Verify schedule 40 sizes, check sch 40 dimensions, and use products that match the pipe material and application. With careful planning and disciplined installation habits, pvc schedule 40, stainless steel, and other SCH 40 systems can be installed more cleanly, safely, and reliably.
 English
 Afrikaans
 Arabic
 Bengali
 Catalan
 Chinese
 French
 Dutch (Belgium)
 Dutch
Dutch German
 Czech
Czech Greek
Greek Hindi
Hindi Japanese
 Italian
 Portuguese
 Spanish (Chile)
 Spanish (Colombia)
 Spanish (Argentina)
 Persian
 Estonian
 Albanian
 Russian
 Spanish (Peru)
 Indonesian
 Thai
Thai Vietnamese
 Georgian
 Korean
 Nepali
 Polish
 Ukrainian
 Malayalam
 Xhosa
Xhosa